Jane’s Chicken Wings Cooking Instructions: A Comprehensive Guide
Jane’s guide delivers flavorful chicken wings, perfect for game days or parties, offering diverse tastes through varied cooking methods and sauce combinations.
Understanding Chicken Wings
Chicken wings are a universally loved culinary delight, transitioning from a humble cut to a centerpiece of social gatherings and sporting events. Their appeal lies in their versatility – they readily absorb flavors, lending themselves to a vast spectrum of sauces and seasonings. Understanding the inherent qualities of wings is crucial for achieving optimal results.
Wings aren’t just about the meat; the skin plays a pivotal role in texture and flavor. Achieving crispy skin is often the primary goal for many wing enthusiasts. The fat content within the skin renders during cooking, creating that desirable crunch. Different cooking methods impact this process differently, as we’ll explore later.
Furthermore, appreciating the wing as a whole – considering its various parts – enhances the cooking experience. From the meaty drumette to the flavorful flat, each section offers a unique bite. Even the often-discarded wing tip can contribute to stock or broth, minimizing waste and maximizing flavor. Ultimately, understanding these nuances unlocks the potential for truly exceptional wings.
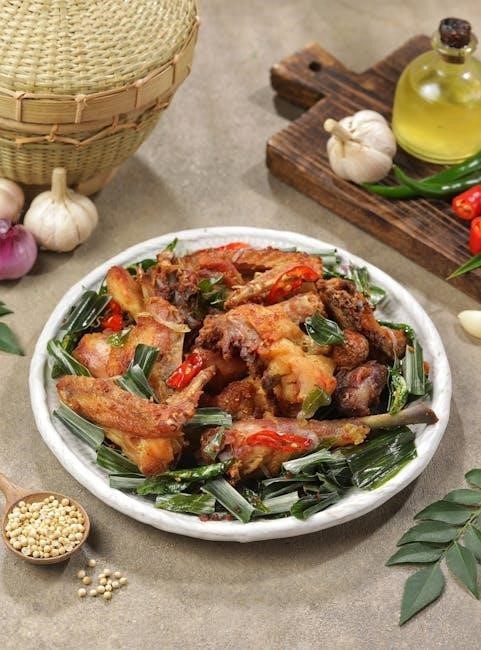
Wing Anatomy: Flats, Drums, and Tips
A chicken wing isn’t a monolithic entity; it’s comprised of three distinct sections, each with unique characteristics impacting cooking and enjoyment. The “drumette,” resembling a miniature drumstick, is the first segment, prized for its substantial meat content and easy handling. It cooks relatively evenly, offering a satisfying bite.
Next comes the “flat” or “wingette,” possessing two bones and a higher skin-to-meat ratio. This section is renowned for its crispy skin potential and ability to soak up sauces. Achieving optimal crispness on flats requires careful attention to cooking time and temperature.
Finally, the “wing tip” – often discarded, but valuable for flavor. While containing minimal meat, it’s rich in cartilage and connective tissue, ideal for enriching stocks and broths. Don’t underestimate its contribution to a flavorful culinary experience! Recognizing these anatomical differences allows for tailored cooking approaches, ensuring each section reaches its full potential.
Choosing Your Chicken Wings
Selecting the right chicken wings is paramount to a successful outcome. Consider size – larger wings generally offer more meat, while smaller ones crisp up more readily. Look for wings that appear plump and have a natural pinkish hue, avoiding those with bruising or discoloration. Freshness is key; if purchasing pre-packaged, check the “sell-by” date diligently.
Whole wings versus separated wings present a choice. Whole wings require your own sectioning, offering cost savings and control. Pre-separated wings save time and effort, convenient for quick meals. Inspect for any broken bones or missing sections, ensuring a complete product.
Organic or free-range options, while pricier, often boast superior flavor and texture. Ultimately, the best wings are those that meet your budget and quality preferences. Don’t hesitate to ask your butcher for recommendations – they can provide valuable insights!
Fresh vs. Frozen Chicken Wings
The debate between fresh and frozen chicken wings often arises. Fresh wings generally offer superior texture and flavor, as they haven’t undergone the freezing process which can sometimes compromise cell structure. However, they must be used promptly, ideally within one to two days of purchase.
Frozen wings provide convenience and a longer shelf life. They are readily available and perfect for spontaneous cravings. While texture can be slightly affected, proper thawing techniques minimize this impact. Ensure the packaging is airtight to prevent freezer burn, which leads to dryness and off-flavors.
If using frozen wings, complete thawing is crucial for even cooking. Avoid thawing at room temperature; instead, opt for refrigeration overnight or a cold-water bath. Regardless of your choice, quality matters – select reputable brands for optimal results. Both options can yield delicious wings with the right preparation!

Preparation Techniques
Jane emphasizes proper preparation for exceptional wings: thawing, drying the skin for crispiness, and brining to infuse flavor and ensure tender, juicy results every time.
Thawing Frozen Chicken Wings
Jane strongly advises against thawing wings at room temperature due to potential bacterial growth. The safest and most recommended method is refrigerator thawing. Place the frozen wings in a leak-proof container or a resealable plastic bag and transfer them to the refrigerator.
Allow ample time for thawing – typically, this takes several hours, even overnight, depending on the quantity of wings. For quicker thawing, submerge the wings (still in their sealed packaging) in a bowl of cold water, changing the water every 30 minutes. This method significantly reduces thawing time, but requires more attention.
Never refreeze wings that have been thawed using the cold water method. Once thawed, wings are best used immediately or within one to two days when stored properly in the refrigerator. Proper thawing is crucial for even cooking and optimal texture, setting the stage for perfectly crispy and flavorful wings.
Patting Wings Dry for Crispy Skin
Jane emphasizes that achieving truly crispy chicken wings hinges on a seemingly simple step: thoroughly drying the wings. Moisture is the enemy of crispiness! After thawing (or even if starting with fresh wings, which naturally have some surface moisture), lay the wings out on a clean kitchen towel or several layers of paper towels.
Using more paper towels, gently but firmly pat each wing dry, removing as much surface moisture as possible. Don’t be shy – this step requires a bit of effort. For optimal results, let the wings air dry uncovered in the refrigerator for at least 30 minutes, or even up to a few hours, after patting them dry.
This extra step allows any remaining surface moisture to evaporate, further enhancing the crisping process during cooking. Remember, dry wings equal crispy wings, and crispy wings are the foundation of a truly satisfying wing experience!
Brining Chicken Wings for Flavor and Tenderness
Jane advocates for brining chicken wings, a technique often reserved for larger cuts, to elevate both flavor and texture. Brining involves submerging the wings in a saltwater solution, often with added sugar and aromatics, for several hours.
A basic brine consists of about 1/4 cup of salt and 1/4 cup of sugar per gallon of water. Jane suggests adding peppercorns, bay leaves, garlic cloves, or even hot sauce to customize the flavor profile. Submerge the wings completely in the brine, ensuring they remain refrigerated for at least 4 hours, but ideally overnight.
The salt in the brine penetrates the wing meat, seasoning it from the inside out and helping it retain moisture during cooking. The sugar balances the salt and contributes to browning. Brining results in incredibly juicy and flavorful wings, even before any sauce is applied, making it a worthwhile step for wing perfection!

Cooking Methods
Jane details several methods: deep frying for classic crispiness, baking for a healthier approach, air frying for convenience, and boiling then frying for ultimate texture.
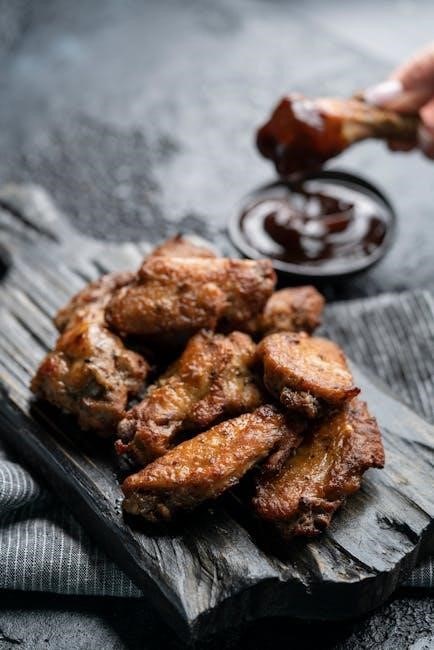
Deep Frying: The Classic Approach
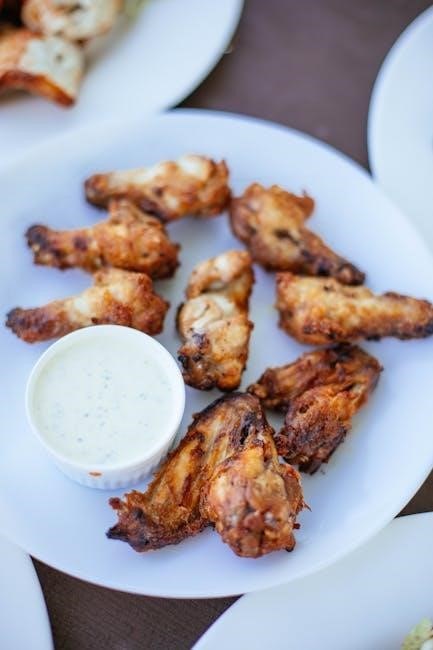
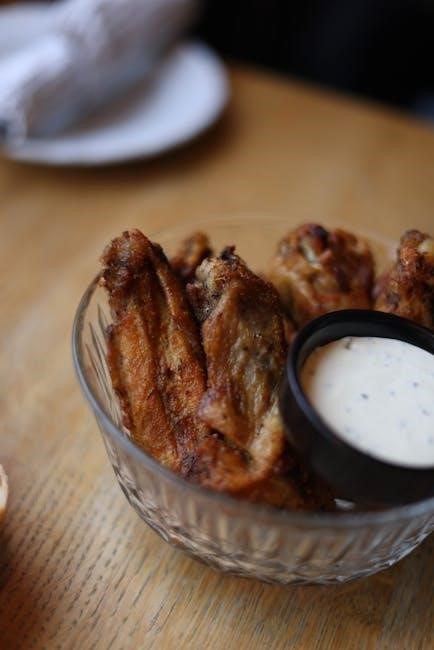
Jane emphasizes deep frying as the traditional method for achieving incredibly crispy chicken wings. Begin by heating approximately 3-4 inches of oil – peanut, canola, or vegetable oil work well – in a large, heavy-bottomed pot or deep fryer to 350°F (175°C). Carefully add the wings in batches, avoiding overcrowding the pot, as this will lower the oil temperature and result in soggy wings.
Fry for 8-12 minutes, flipping halfway through, until golden brown and cooked through. Internal temperature should reach 165°F (74°C). Remove the wings with a slotted spoon and place them on a wire rack lined with paper towels to drain excess oil. Jane advises seasoning immediately after frying while the wings are still hot, ensuring the seasoning adheres properly. This method delivers the most authentic, satisfying crunch, though it’s the least health-conscious option. Proper oil temperature is crucial for optimal results; use a thermometer to maintain consistency.
Baking Chicken Wings for a Healthier Option
Jane presents baking as a fantastic alternative for those seeking a healthier way to enjoy crispy chicken wings. Preheat your oven to 400°F (200°C). Line a baking sheet with parchment paper or a silicone baking mat to prevent sticking. Arrange the wings in a single layer, ensuring they aren’t overcrowded for even cooking.
For optimal crispiness, Jane recommends tossing the wings with a small amount of oil – about a tablespoon per pound – and your desired seasonings. Baking typically takes 40-45 minutes, flipping the wings halfway through. To achieve extra crispy skin, broil for the last 5-10 minutes, keeping a close watch to prevent burning. While baking doesn’t deliver quite the same level of crunch as deep frying, it significantly reduces the fat content and is a convenient, hands-off cooking method. Ensure wings reach an internal temperature of 165°F (74°C).
Air Frying: A Convenient Alternative
Jane champions air frying as a remarkably convenient method for achieving incredibly crispy chicken wings with minimal oil. Preheat your air fryer to 380°F (190°C). Lightly coat the wings with oil – just a teaspoon or two per pound – and your preferred seasonings or dry rub. Arrange the wings in the air fryer basket in a single layer, avoiding overcrowding; you may need to work in batches.
Air fry for approximately 20-25 minutes, flipping halfway through, until the wings are golden brown and crispy. Jane emphasizes that air frying delivers results remarkably close to deep frying, but with significantly less fat. Check for an internal temperature of 165°F (74°C) to ensure they are fully cooked. The circulating hot air creates a beautifully textured, crispy skin, making air frying a quick and easy option for a delicious wing experience.
Boiling then Baking/Frying: Achieving Extra Crispy Skin
Jane reveals a secret technique for exceptionally crispy wings: boiling before baking or frying. Begin by placing the wings in a large pot and covering them with water. Bring to a boil, then reduce heat and simmer for 10-12 minutes. This process renders some of the fat from the skin and begins to break down the collagen, resulting in a more tender and incredibly crispy final product.
After boiling, pat the wings thoroughly dry – this is crucial! – and then either bake at 400°F (200°C) for 20-25 minutes, flipping halfway, or deep fry until golden brown and crispy. Jane notes that the boiling step allows the skin to puff up more during the final cooking stage, creating an unparalleled level of crunch. Ensure an internal temperature of 165°F (74°C) is reached for safe consumption.

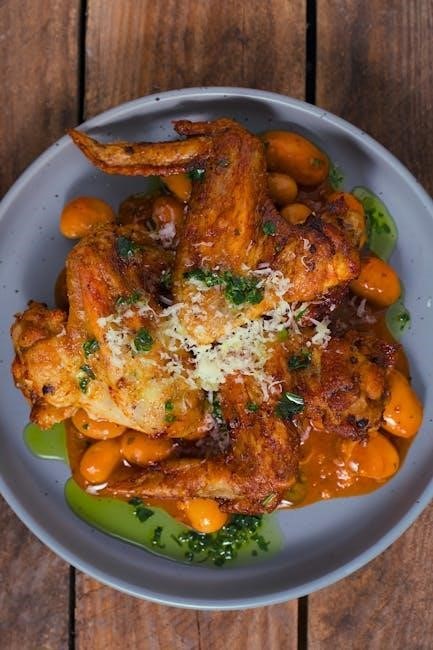
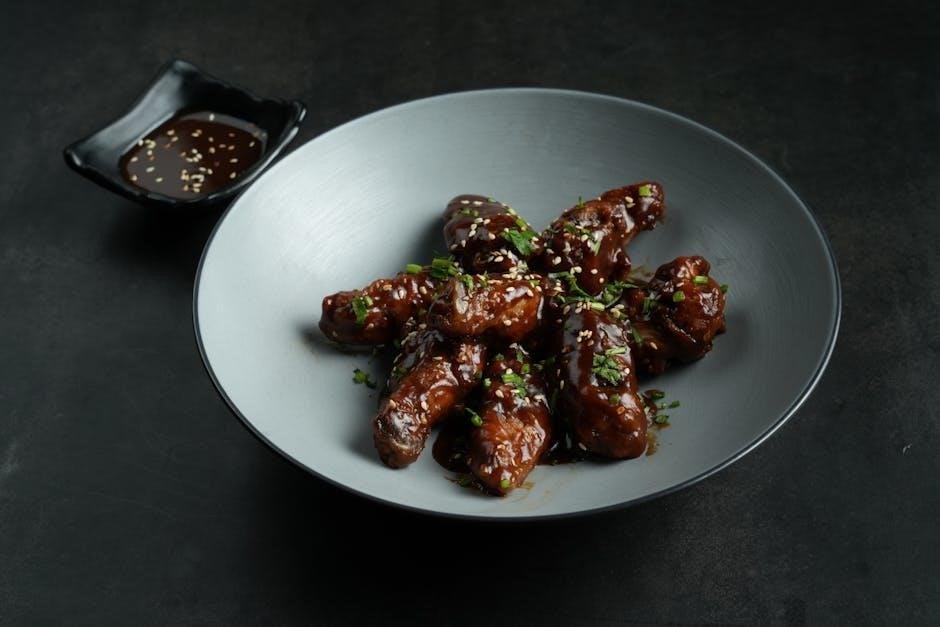
Sauces and Seasonings
Jane expertly blends classic Buffalo sauce with spicy variations and flavorful dry rubs, complemented by creamy homemade ranch or blue cheese dips for perfect wings.
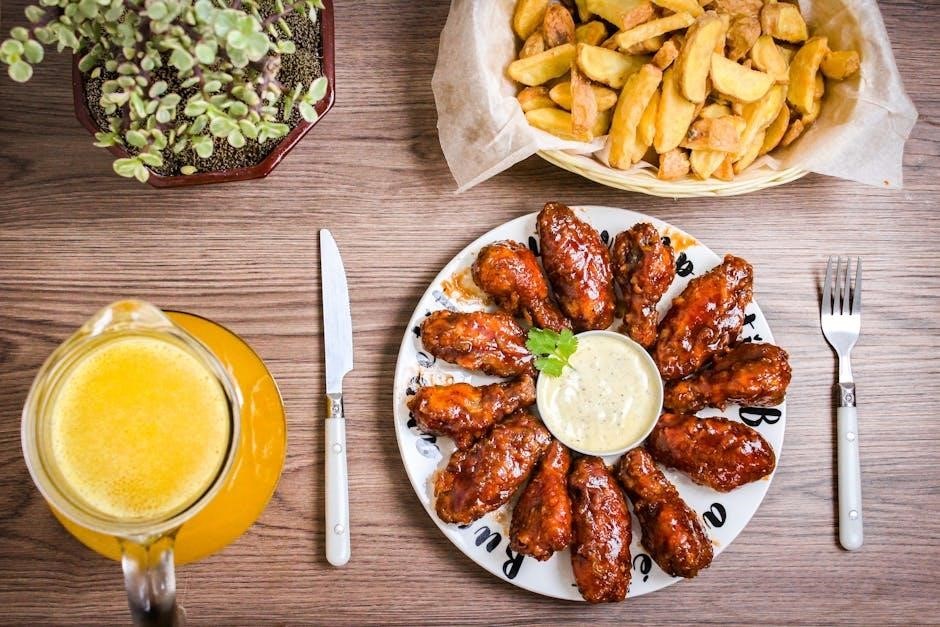
Classic Buffalo Wing Sauce Recipe
Jane’s signature Buffalo wing sauce delivers that iconic tangy heat! Begin with ½ cup (1 stick) of unsalted butter, melted until smooth. In a saucepan, whisk together ½ cup of Frank’s RedHot Original Cayenne Pepper Sauce – this is crucial for authentic flavor. Add 1 tablespoon of white vinegar for brightness and a dash of Worcestershire sauce for depth.
For a subtle sweetness to balance the spice, incorporate ½ teaspoon of sugar. Gently heat the mixture over medium-low heat, stirring constantly until fully combined and slightly thickened – avoid boiling! Taste and adjust seasoning as needed; a pinch of garlic powder can enhance the flavor.
Jane recommends using this sauce immediately after making it for the best results. Toss your cooked chicken wings generously in the sauce, ensuring every piece is coated. Serve immediately with celery sticks and your favorite dipping sauce for a truly classic experience. This recipe yields approximately 1 cup of sauce, perfect for about 2 pounds of wings.
Spicy Wing Sauce Variations
Jane believes spice is personal! Beyond classic Buffalo, explore fiery variations. For a Korean Gochujang kick, blend ¼ cup Gochujang paste with ¼ cup honey, 2 tablespoons soy sauce, 1 tablespoon rice vinegar, and 1 teaspoon sesame oil. Adjust Gochujang for desired heat.
Craving Caribbean heat? Combine ¼ cup mango puree, 2 tablespoons Scotch bonnet pepper sauce (use cautiously!), 1 tablespoon lime juice, and a pinch of allspice. For a smoky chipotle experience, blend ¼ cup chipotle peppers in adobo sauce with ¼ cup ketchup, 1 tablespoon brown sugar, and 1 teaspoon smoked paprika.
Jane suggests adding a splash of orange juice to any sauce for brightness. Experiment with different chili powders – ancho, guajillo, or habanero – to customize the heat level. Remember to taste and adjust seasonings! Always handle hot peppers with care, and consider wearing gloves. These variations elevate your wing game beyond the ordinary.
Dry Rubs for Flavorful Wings
Jane champions dry rubs for intense flavor penetration. Start with a base of paprika, garlic powder, onion powder, and black pepper – about 2 tablespoons each. For a classic smoky rub, add 1 tablespoon smoked paprika and 1 teaspoon cayenne pepper.
Elevate with a Southwestern blend: combine 2 tablespoons chili powder, 1 tablespoon cumin, 1 teaspoon oregano, and ½ teaspoon chipotle powder. A lemon-pepper rub is refreshing – mix 2 tablespoons lemon zest, 1 tablespoon black pepper, and 1 teaspoon garlic powder.
Jane recommends generously coating the wings with the rub at least 30 minutes before cooking, or ideally overnight in the refrigerator. This allows the flavors to meld. Don’t be afraid to experiment! Add brown sugar for a touch of sweetness, or herbs like thyme or rosemary for complexity. A good dry rub minimizes the need for sauce, letting the chicken’s flavor shine.
Homemade Ranch or Blue Cheese Dip
Jane insists no wing feast is complete without a creamy, cooling dip! For homemade ranch, start with 1 cup mayonnaise, ½ cup sour cream, and ½ cup buttermilk. Add 1 tablespoon chopped fresh chives, 1 tablespoon chopped fresh parsley, 1 teaspoon garlic powder, ½ teaspoon onion powder, and a pinch of salt and pepper.
Blue cheese lovers, rejoice! Combine 1 cup mayonnaise, ½ cup sour cream, ½ cup crumbled blue cheese, ¼ cup buttermilk, 1 tablespoon lemon juice, and a dash of Worcestershire sauce. Adjust blue cheese to taste.
Jane suggests chilling both dips for at least 30 minutes to allow the flavors to meld. For a smoother ranch, blend all ingredients in a food processor. Garnish with extra herbs before serving. These dips perfectly complement the spice of the wings, offering a delightful contrast and enhancing the overall experience.
Serving and Enjoying
Jane recommends pairing wings with classic sides like celery, carrots, and your chosen dip. Don’t forget plenty of napkins for a mess-free, enjoyable experience!
Best Sides for Chicken Wings
Jane believes the perfect wing experience extends beyond the wings themselves! Complementing their bold flavors requires thoughtful side choices. Classic celery and carrot sticks, served with a cooling dip like ranch or blue cheese, provide a refreshing counterpoint to the spice. These crisp vegetables offer a textural contrast and help cleanse the palate between bites.
For a heartier accompaniment, consider crispy french fries or sweet potato fries – their saltiness and satisfying crunch pair wonderfully. Coleslaw, with its creamy and tangy dressing, adds another layer of flavor and texture. Potato salad, especially a classic American version, is always a crowd-pleaser.
Don’t underestimate the power of simple sides! A fresh garden salad with a light vinaigrette offers a healthy balance. Corn on the cob, grilled or boiled, brings a touch of sweetness. Ultimately, Jane encourages experimentation – choose sides that you and your guests will enjoy most alongside those delicious wings!
Proper Wing Etiquette (Napkins!)
Jane insists that enjoying wings is a delightfully messy affair, and embracing that mess is part of the fun! However, a little etiquette goes a long way. First and foremost: napkins are your best friend. Stockpile them liberally! Don’t be shy about using them – wings are inherently sticky and saucy.
When tackling a wing, Jane recommends a bite-and-wipe approach. Take a bite, then immediately dab any excess sauce. Avoid touching your face or anything else with saucy fingers. Sharing is caring, but use serving tongs or designated utensils to avoid a communal sauce-spreading situation.
Dispose of bones responsibly – a small bowl for discarded bones is a thoughtful touch. And finally, remember to savor the experience! Wings are meant to be enjoyed with good company and a relaxed attitude. Don’t worry about being perfect; just focus on enjoying those flavorful, crispy wings!
Reheating Chicken Wings for Optimal Crispiness
Jane understands that leftover wings are a treasure, but reheating can be tricky. Avoid the microwave – it leads to soggy sadness! The best method is the oven. Preheat to 350°F (175°C). Spread the wings in a single layer on a baking sheet lined with parchment paper.
For truly crispy results, Jane suggests baking for about 8-12 minutes, flipping halfway through. A quick spritz of cooking oil before reheating can also help restore some of that initial crispness. Alternatively, an air fryer works wonders! Reheat at 375°F (190°C) for 5-7 minutes, shaking the basket occasionally.
If you’re short on time, a dry skillet can work in a pinch. Heat a skillet over medium-high heat, add the wings, and cook for a few minutes per side, until heated through and crispy. Remember, the goal is to re-crisp the skin, so avoid overcrowding the pan.