
Singer One Instruction Manual: A Comprehensive Guide
This guide provides detailed instructions for the Singer One, covering setup, operation, maintenance, and troubleshooting – a 60-page PDF manual is available!
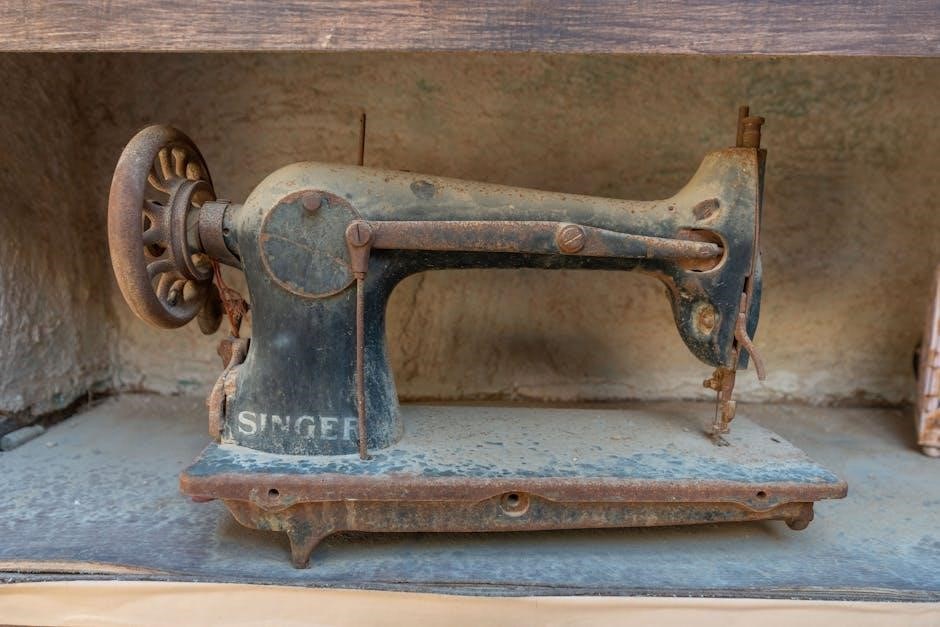
The Singer One represents a modern approach to sewing, blending simplicity with powerful features. This innovative machine is designed for both beginners and experienced sewists, offering a user-friendly experience. It’s a compact, portable machine, ideal for various sewing projects and skill levels.
Access to a comprehensive instruction manual, available as a 60-page PDF, ensures users can quickly learn and master its capabilities. Explore tutorials, specifications, and frequently asked questions to maximize your sewing potential with the Singer One.
Unboxing and Initial Setup
Upon unboxing your Singer One, carefully inspect all components. Ensure the machine, power cord, accessories, and the instruction manual (PDF format) are present. Before first use, remove all packaging materials. Connect the power cord securely.
Refer to the manual for detailed setup instructions, including attaching the bobbin and threading the upper thread. Familiarize yourself with the machine’s basic functions before starting a project. A properly set up machine ensures optimal performance and longevity.
Machine Components Overview
The Singer One boasts a streamlined design with essential components for versatile sewing. Key parts include the power switch, handwheel, needle clamp, presser foot, feed dogs, and bobbin winder. The control panel features stitch selection and adjustable settings.
Understanding each component’s function, as detailed in the instruction manual, is crucial. The lightweight and portable design makes it ideal for various sewing spaces. Refer to the PDF for a visual guide to each part.
Identifying Key Parts
Essential Singer One parts include the needle, responsible for stitch formation, and the presser foot, which holds fabric in place. The bobbin case and its winding mechanism are vital for lower threading. Locate the handwheel for manual control and the feed dogs that advance fabric.
The instruction manual’s diagrams clearly illustrate each part’s location. Familiarizing yourself with these components, as outlined in the PDF, ensures proper machine operation and maintenance.
Understanding the Control Panel
The Singer One’s control panel features intuitive buttons for power, stitch selection, and speed control. The digital display showcases chosen stitch settings. Stitch length and width adjustments are easily made via dedicated controls.
Refer to the instruction manual – a 60-page PDF – for a detailed breakdown of each function. Understanding these controls is crucial for customizing your sewing projects and achieving desired results. Explore the online resources for further clarification.
Threading the Singer One
Proper threading is essential for optimal Singer One performance. The instruction manual (available as a 60-page PDF) provides a step-by-step guide for both upper and lower threading.
Follow the numbered diagrams carefully to ensure correct thread path. Incorrect threading can lead to skipped stitches or machine malfunctions. Mastering this process, detailed in the resources, will guarantee smooth and efficient sewing.
Upper Threading Guide
Begin by raising the presser foot. Guide the thread from the spool, through the first thread guide, and then down and around the tension disc – crucial for stitch quality.
Next, thread the take-up lever and continue through the remaining guides, leading to the needle. The Singer One instruction manual’s PDF provides clear diagrams. Ensure the thread is securely seated in the needle clamp before starting to sew.
Bobbin Winding and Insertion
To wind the bobbin, place the thread spool on the holder and guide the thread through the designated tension disc. Engage the bobbin winding mechanism, following the Singer One instruction manual’s diagram.
Once full, disengage and trim the thread. Insert the bobbin into the bobbin case, ensuring it clicks into place. The PDF manual details proper insertion; correct placement is vital for smooth sewing operation.
Basic Sewing Operations
The Singer One simplifies sewing with its intuitive controls. Begin by selecting a stitch pattern from the available options, as outlined in the instruction manual. Adjust stitch length and width using the corresponding dials, eliminating guesswork for beginners.
To start, gently press the foot pedal, guiding the fabric smoothly. Stop by lifting the presser foot or releasing the pedal. Refer to the PDF manual for detailed guidance on these fundamental techniques.
Selecting Stitch Patterns

The Singer One boasts a variety of stitch patterns to suit diverse projects. Consult the instruction manual, specifically the stitch guide, to understand each pattern’s application. The machine features 11 pre-set stitches, simplifying selection for beginners.
Use the stitch selection dial to effortlessly cycle through options. The PDF manual provides visual representations of each stitch and recommended uses, ensuring optimal results for every sewing endeavor. Experiment to discover creative possibilities!
Adjusting Stitch Length and Width
The Singer One simplifies stitch customization. While many stitches have preset lengths and widths – ideal for beginners – some adjustments are possible. Refer to your instruction manual for specific controls.
Typically, a dial or digital interface controls stitch length, impacting the density of stitches. Width adjustments, where available, modify the zigzag pattern’s breadth. The PDF manual details these settings, ensuring precise control for varied fabrics and desired aesthetics.
Starting and Stopping Sewing
Beginning with the Singer One is straightforward. Ensure fabric is positioned correctly under the presser foot and gently depress the foot pedal to initiate sewing. Consistent speed yields even stitches.
To stop, release the foot pedal. A backstitch lever or button secures the seam by reversing a few stitches. Always lift the presser foot and needle before maneuvering fabric. Consult the instruction manual’s PDF version for detailed guidance on safe and effective operation.
Advanced Sewing Techniques
The Singer One expands creative possibilities beyond basic stitches. Explore diverse presser feet – specialized options enhance capabilities for zippers, buttonholes, and decorative applications. Mastering varied fabric types requires adjusting stitch settings and needle selection, detailed in the instruction manual.
Experiment with stitch combinations and techniques to achieve professional results. The PDF manual offers tutorials and inspiration for advanced projects, unlocking the full potential of your machine.
Using Different Presser Feet
The Singer One’s versatility increases with optional presser feet. Specialized feet, available as accessories, tackle unique projects. A zipper foot simplifies insertion, while a buttonhole foot ensures consistent results. Decorative feet add embellishments, expanding creative options.
Refer to the instruction manual or online resources for proper foot attachment and usage. Selecting the correct foot optimizes stitch quality and simplifies complex sewing tasks, enhancing your overall experience.
Sewing Various Fabric Types
The Singer One adapts to diverse fabrics with adjusted settings. Lightweight fabrics require finer needles and lower stitch lengths. For heavier materials like denim, use a heavier needle and increase stitch length. Always test on a scrap piece first!
Consult the manual for recommended settings for specific fabrics. Proper needle and thread selection are crucial for optimal results and preventing damage to both the machine and the fabric.
Maintenance and Troubleshooting
Regular Singer One maintenance ensures longevity. Cleaning lint and debris from the bobbin area and feed dogs is vital. Refer to the manual for specific oil points and lubrication guidance.
Common issues like jammed thread can often be resolved by re-threading. The manual details error codes and their meanings, aiding in quick diagnosis and solutions. Preventative care minimizes potential problems!
Cleaning the Singer One
Regular cleaning of your Singer One is crucial for optimal performance. Power off and unplug the machine before starting. Use a soft brush to remove lint and dust from the bobbin area, feed dogs, and surrounding components.
A small vacuum cleaner attachment can help reach tight spaces. Avoid using liquids or harsh chemicals. Consult the instruction manual for detailed cleaning diagrams and recommendations to maintain your sewing machine.
Oil Points and Lubrication
Proper lubrication ensures smooth operation of your Singer One. Refer to the instruction manual for specific oiling points – typically around the bobbin area, hook, and motor components. Use only sewing machine oil; other lubricants can cause damage.
Apply oil sparingly, wiping away any excess. Over-oiling can attract lint and create problems. Regular oiling, as outlined in the manual, will prolong the life of your machine and maintain its performance.

Common Issues and Solutions
Encountering problems with your Singer One is common. Thread jamming is frequent; re-thread carefully, ensuring proper tension. Needle breakage often indicates incorrect needle type or fabric mismatch – consult the needle guide.
If the machine fails to start, check the power cord and foot pedal. The instruction manual details error codes and their meanings, offering specific troubleshooting steps. Regular cleaning and maintenance prevent many issues.
Needle and Thread Guide
Selecting the correct needle is crucial for optimal sewing. The Singer One instruction manual details needle types for various fabrics – universal, ballpoint, and stretch needles are common. Thread compatibility is equally important; use quality thread appropriate for your fabric weight.
Always refer to the chart within the manual for recommended thread types and needle sizes. Using mismatched components can cause skipped stitches, thread breakage, or fabric damage.
Choosing the Right Needle
Selecting the appropriate needle significantly impacts stitch quality. The Singer One manual recommends universal needles for woven fabrics, ballpoint needles for knits to avoid runs, and stretch needles for highly elastic materials like spandex.
Needle size corresponds to fabric weight; smaller numbers for delicate fabrics, larger for heavier ones. Always replace needles regularly – a dull needle causes strain and poor stitch formation. Refer to the manual’s chart for specific fabric and thread combinations.
Thread Compatibility Chart
The Singer One performs best with quality polyester or cotton-wrapped polyester threads. Avoid heavily textured or novelty threads initially. The manual details recommended thread weights (sizes) for various needle sizes and fabric types.

Generally, finer fabrics pair with lighter weight threads (e.g., 50-60wt), while heavier fabrics require stronger threads (e.g., 40wt). Always test thread compatibility on a scrap fabric piece before starting your project to ensure optimal stitch quality and prevent issues.
Safety Precautions
Always disconnect the Singer One from the power source before threading, changing the needle, or performing any maintenance. Keep fingers away from moving parts, especially the needle and presser foot, during operation.
Never sew over pins or thick layers of fabric. Use the correct needle for the fabric type to prevent breakage and injury. Ensure the machine is stable on a flat surface before use. Supervise children when near the sewing machine at all times.
Understanding Stitch Functions
The Singer One offers a variety of stitch patterns for diverse projects. Straight stitches are ideal for seams and general construction, providing a strong and reliable hold. Zigzag stitches excel in finishing raw edges, creating decorative elements, and sewing stretch fabrics.

Experiment with stitch length and width to achieve desired results. Refer to the manual for specific applications of each stitch, maximizing the machine’s versatility for all your sewing needs.
Straight Stitch Applications
Straight stitches on the Singer One are foundational for garment construction, quilting, and basic repairs. Utilize them for creating durable seams in woven fabrics, topstitching for a professional finish, and basting for temporary holds.
Adjusting stitch length impacts strength; shorter stitches for delicate fabrics, longer for heavier materials. Mastering the straight stitch unlocks a wide range of sewing possibilities, forming the core of many projects;
Zigzag Stitch Applications
Zigzag stitches on the Singer One offer versatility beyond straight sewing. Employ them to finish raw edges, preventing fabric fraying, and create decorative embellishments. This stitch excels at sewing stretch fabrics, allowing for seam give and preventing breakage.
Adjusting width and length alters the effect; wider for decorative purposes, narrower for secure edge finishing. Zigzag is also ideal for appliqué and creating buttonholes, expanding your creative options.
Accessing the Digital Manual
The Singer One’s comprehensive instruction manual is readily available online as a PDF document, containing 60 pages of detailed guidance. Easily download the PDF manual from the official SINGER website for convenient access on your devices.
Explore extensive online resources, including tutorials, FAQs, and specifications. These digital tools supplement the printed guide, offering additional support and troubleshooting assistance for your sewing machine.
Downloading the PDF Manual

Accessing the Singer One’s digital manual is straightforward. Visit the official SINGER website and navigate to the support section dedicated to the Singer One model. Locate the PDF manual download link – it’s a 60-page document.
Clicking the link will initiate the download, allowing you to save the manual directly to your computer or mobile device. Ensure a stable internet connection for a smooth download process. This provides offline access to all instructions!
Navigating the Online Resources
SINGER’s website offers extensive support beyond the PDF manual. Explore the dedicated Singer One support page for tutorials, frequently asked questions, and troubleshooting guides. You’ll find specifications and a section for submitting questions directly to SINGER support.
These online resources complement the manual, providing visual aids and addressing common user concerns. Utilize the search function to quickly locate specific information related to your Singer One sewing machine.
Troubleshooting Common Errors
Singer One users may encounter issues like jammed thread or error codes. Refer to the instruction manual for detailed solutions. Common error codes have specific meanings outlined within the PDF document, guiding you towards the problem’s source.
If thread jams, ensure proper threading and bobbin insertion. Online resources also offer troubleshooting steps. Regularly cleaning the machine can prevent many errors, ensuring smooth operation of your Singer One.
Error Codes and Meanings
The Singer One utilizes error codes to signal specific malfunctions. The comprehensive instruction manual, available as a PDF, details each code’s meaning. These codes pinpoint issues ranging from threading problems to motor inconsistencies.

Understanding these signals allows for targeted troubleshooting, preventing unnecessary repairs. Referencing the code list within the manual ensures accurate diagnosis and efficient resolution of any operational difficulties with your Singer One sewing machine.
Resolving Jammed Thread
A common issue, jammed thread on the Singer One, requires a systematic approach. First, stop the machine and disconnect the power. Gently remove the fabric and inspect the bobbin area and upper threading path for tangled threads.
Consult the instruction manual’s PDF for detailed diagrams. Re-thread both the upper and lower threads, ensuring proper tension. Slow, deliberate sewing after re-threading often prevents recurrence of this frustrating problem.
Optional Accessories
Enhance your Singer One experience with a variety of optional accessories! Explore specialized presser feet for diverse projects, expanding your sewing capabilities beyond basic stitches. Different bobbin types are available, ensuring compatibility and smooth operation.
SINGER offers a wide range of accessories designed to optimize your machine’s performance. Check the official SINGER website for current availability and pricing of these helpful additions to your sewing toolkit.

Presser Feet Variety
SINGER offers a diverse selection of presser feet for the Singer One, unlocking specialized sewing techniques. These include options for zippers, buttonholes, blind hems, and decorative stitching. Utilizing the correct foot dramatically improves stitch quality and project efficiency.
Explore feet designed for specific fabrics like denim or stretch materials. Investing in a variety of presser feet expands the Singer One’s versatility, allowing you to tackle a wider range of sewing projects with professional results.
Bobbin Types and Availability
The Singer One utilizes class 15 bobbins, readily available at most fabric stores and online retailers. These plastic bobbins are designed for smooth, consistent feeding of the lower thread, crucial for balanced stitches.
Ensure you purchase genuine SINGER bobbins or high-quality compatible alternatives to prevent machine malfunctions. Maintaining an adequate supply of bobbins streamlines your sewing process, avoiding interruptions during projects. Check the SINGER website for availability and bulk purchase options.
Warranty Information
SINGER offers a limited warranty on the Singer One sewing machine, protecting against defects in materials and workmanship. The standard warranty period is typically one year from the date of original purchase, covering mechanical issues.
This warranty excludes normal wear and tear, misuse, or unauthorized repairs. Retain your proof of purchase for warranty claims. Visit the official SINGER website for detailed warranty terms and conditions, and registration information.
Contacting Singer Support
SINGER provides multiple avenues for customer support regarding the Singer One. Visit the official SINGER website for FAQs, troubleshooting guides, and downloadable resources, including the PDF manual.
You can also reach SINGER support via phone or email, details of which are available on their website. For personalized assistance, consider utilizing their online chat feature; Ensure your machine’s model number is ready when contacting support for efficient service.